Visit and bookmark the new Karol's Krafts website!
Karol's Krafts has moved to its own website! All new posts will be on that website going forward, and all old posts will be transferred there.
November 12, 2010
September 22, 2010
Back to Krafts!
Extra time for crafts has become slimmer and slimmer these days, but I managed to pull a "college days" all-nighter over the holiday weekend to complete this gift for my cousin's daughter's birthday gift. I wanted to give a shot at making felt food, so I found this neat book, My Favorite Felt Sweets, that has easy instructions.
Then, by chance, I saw this segment on the Martha Stewart show on a cardboard box play oven/gift box. It was a perfect idea to complete the gift. However, not to rag on the creator, The Crafty Buffet, but her version was a bit unrefined for my taste. This is a great gift box idea for any child. All you need is a filebox (the kind with the lid attached, about $6 from Office Depot), black condiment cups (free from fast food establishments such as La Salsa or Baja Fresh), old or blank CDs or DVDs, scrapbooking paper, paint, paper fasteners (brads), a clear sheet protector and other basic tools like an exacto knife, craft glue and additional cardboard. The instructions on MS say to spraypaint the box, but I found that painting with gesso or primer, and then with tempera or acrylic paint with a brush is more effective. Exact instructions on the MS website link above. Here is the finished product:


The box also fit the other store-bought gifts (mini aluminum pots and pans) perfectly:

Here are the two felt food desserts I made (took way longer than anticipated):


Staying up for almost 24 hours to make this was totally worth it...it's been awhile since I've made something that I wanted to keep for myself!
After getting some shut-eye, I made this cheesecake for my brother's birthday:

After getting some shut-eye, I made this cheesecake for my brother's birthday:
August 31, 2010
Grated Carrots + Carrot Cupcakes
I finally had some time to get in the kitchen to experiment more with grated carrots (and finally use my new oven)!
My future mother in-law is visiting this week (and hooking it up with home-cooked Korean dishes, totally awesome...a post on that will definitely be up soon) and her favorite dessert is carrot cake, so I tried to take a stab at making it.
Hey, carrot cake contains vegetables, so it's a healthy dessert :)

Carrot Cupcakes
INGREDIENTS
6 medium carrots, peeled and finely grated (use a Microplane; organic carrots are recommended)
4 eggs
1/2 cup vegetable oil
1/2 cup unsweetened applesauce
3/4 cup granulated sugar
1/2 cup dark brown sugar
2 cups all-purpose flour
1 1/2 teaspoon baking powder
1 teaspoon baking soda
1/2 teaspoon salt
2 teaspoons cinnamon
1/2 teaspoon nutmeg
1/2 teaspoon allspice
1/4 cup roasted and chopped walnuts (optional)
1/4 cup golden raisins or currants (optional)
DIRECTIONS
If you want to add walnuts, toast them whole (one layer) in the oven at 350 degrees F for 5 to 10 minutes until golden brown; chop into pieces.
Peel and grate carrots and set aside. This took me about 30 minutes and it makes for a great arm workout!
Preheat oven to 350 degrees F at this point.
In a bowl, mix all dry ingredients (flour, baking powder, baking soda, salt, cinnamon, nutmeg and allspice). Set aside
In another bowl, mix eggs and sugars until pale and smooth. Add vegetable oil and applesauce. Stir until incorporated.
Fold in grated carrots (and optional nuts and/or raisins).
Scoop two tablespoons in cupcake tins lined with baking cups.
Bake at 350 degrees F for 20 minutes or until a toothpick comes out clean from the center.
Makes 22 cupcakes.

This cake is so moist that no frosting is necessary, but if you want to make it extra sweet, a nice cream cheese frosting or glaze would be a great accompaniment.
August 20, 2010
Pet Products by Martha Stewart
Martha Stewart fans, she has teamed up with Petsmart to launch a line of pet products!
The best thing is the signature MS blue color, which will match perfectly with my dog, Chiwee.
Here are some of my favorites:
+Martha Stewart Pet Bath Tub ($19.99). How adorable is this? I guess if you had babies, the tub could do double duty, haha

+Martha Stewart Massager Brush ($11.99). Perfect for pets who love pampering.

+Martha Stewart Food Scoops (($6.99 to $7.99). Scoop kibble fashionably.

+Martha Stewart 3 Piece Bowl Set ($10.00 to $18.99). Convenient cover so you can take food on-the-go. Three sizes and colors available!

+Martha Stewart Skull Plush Chew Toy ($7.99). For your hardcore dawg.

August 19, 2010
Ice Cream!
My fiancee loves ice cream, so much that if I buy a flavor to try and don't eat it within 3 days, it is gone. Buying ice cream from the store can be quite costly, $2.50-$4 for a pint. Making ice cream at home might seem like a chore, but it's really quite easy, especially if you have (or can borrow) an ice cream machine. Plus, like any homemade foods, you control the ingredients and have free reign on flavors!
A few weekends ago, my friend and I went to town on homemade ice cream. I found these nifty plain paper ice cream containers at Smart & Final, about $8 for the 25 cups, $4 for 25 lids. Smart & Final has great food packaging items!
Strawberry, Coconut Lime

Strawberry Ice Cream recipe adapted from Ben & Jerry's Homemade Ice Cream & Dessert Book
We also made some Mint Cookie and Chocolate, but forgot to take photos...and those cartons are all gone now, you can guess who the culprit is...
Anyway, fresh coconuts are my all time favorite food item - refreshing and nutritious!
Homemade Coconut Lime Sorbet
+Prepare most components one day ahead, since you want everything to be chilled before going into the ice cream maker.
+Remember to keep ice cream maker bowl in freezer until use!
INGREDIENTS
4 young coconuts, pulp and water removed and reserved
Simple Syrup (1/2 cup water, 1/4 cup sugar)
Zest of 2 limes
DIRECTIONS
Step 1: Make the Coconut Milk
Open young coconuts (instructional video from youtube) and pour the water into a container or bowl.
Scrape out all the flesh, making sure to remove any brown husk bits (4 coconuts will yield about 2 cups of flesh).
Put flesh in the blender, along with 2 cups of coconut water. Blend until smooth.

Place a fine mesh strainer over a bowl and pour coconut milk mixture through the strainer to remove chunks and impurities. Mixture will be about 3 cups.

Pour into an airtight container (I use mason jars) and chill. Instant fresh coconut milk!

Step 2: Make Simple Syrup
In a small saucepan, combine sugar and water and heat until sugar has dissolved (medium-high heat for about 6 minutes or so).
Remove from heat immediately and let cool. Refrigerate for a few hours until cold.
Step 3: Make the Coconut Lime Mixture for Sorbet
In a bowl, combine chilled coconut milk, simple syrup and zest of two limes.
Pour mixture into chilled ice cream maker bowl and churn according to machine directions (usually about 20-30 minutes).
Once combined, transer into containers and freeze for a few hours before eating.

More Coconut Fun
I also reserved the rest of the coconut water in a mason jar - so ridiculously delicious and refreshing after a workout or on a hot day.

And to use most parts of the coconut, my fiancee stayed up all night making these coconut bowls!

July 31, 2010
Easy Peasy Party Banner
Why spend up to $12 at the party store on a banner?
Now you can say au revoir to the horrendous generic metallic happy birthday sign that your mama used to leave up for months after your birthday party!

It is so easy and cost-effective to make your own banner at home. All you need is a color printer, card stock, scissors, glue, ribbon, clips and an hour or two! The best thing about creating your own banner is that you have full control of what it will look like. You're not restricted to the nasty silver foil banners they sell at the party store that cost $10 but look like they're worth $1.
Homemade Banner
MATERIALS
Computer or laptop, color printer, copy paper, card stock, glue, scissors, ribbon or string, stapler or clips (paper clips, binder clips, etc.)
DIRECTIONS
1) If you want a phrase banner, use a word processing program such as MS Word and choose a font (bolder, sans serif fonts work the best and are easy to cut out) and color(s) to your liking. Type one letter per page, enlarging the font as big as possible that the page can take (usually around 200-300 point, depending on the font). Adjust the page margins if needed.

2) Print out the document in color; you should have one letter per page.
3) Cut out each letter. I find that doing this while watching a television show makes the task go by faster!
4) Find enough card stock for each letter. Cut out either circles or rectangles big enough to fit and have a one inch border around the cut-out letters. Here, I just so happened to have a set of 5" x 7" papers that didn't need to be cut and fit the letters perfectly.
5) Position each letter on each piece of card stock and glue.
6) For a cleaner look, stack the completed letters together on a table and press by placing heavy books on top overnight.
6) For a cleaner look, stack the completed letters together on a table and press by placing heavy books on top overnight.
7) You can use any method to affix the completed letters onto string or ribbon. I happened to have a box of baby shower party favor clips, so I used those to clip each letter onto a piece of white ribbon. You can also use colored paper clips, binder clips or even a stapler to attach the letters. Tip: do not cut the string or ribbon until you have positioned the letters to ensure enough length, and leave an extra 6-10 inches at each end for tying to the wall.

Other Banner Ideas
You can make shape banners without text by cutting out shapes directly on card stock. For example, for a barbecue theme, you could cut out simple silhouette shapes of pigs, chickens, cows, etc.
You have full control and creativity!
July 30, 2010
Entryway Re-Do
One of the house upgrade projects that was actually completed is the renovation of the entryway area. The doors, moldings and walls were still painted in white primer and had small nicks, scratches, the original knob from 1984 was on the front door and the double doors had missing knobs.
Before
...with paint swatches to decide what color to paint the walls.

After

Rugs from Cost Plus, doorknobs, paint and light fixture from Home Depot, Openheimer door hooks from Urban Outfitters, seating chest from a natural wood furniture store in Hayward. We went with a calming green color that would match the rest of the living room, Martha Stewart Living Garden Shed. Best paint ever! I was able to cover both walls with one and a half 7.75 oz. tintable testers (only about $4 each), that way I didn't have to buy a whole quart or gallon and have tons leftover.


Seriously, this paint is really good quality - it goes on the wall smooth with great coverage, has minimal VOC's and barely any odor (I've used Yolo, an expensive eco-friendly paint, in one of the rooms, and the odor lingered for weeks). The bench chest seat was painted in MSL Sharkey Grey.
The MSL paint swatch is my new favorite thing. I swear all the colors are awesome. Pick one up at Home Depot! On a similar subject, I really love the colors on the set of the Martha Stewart show, and of course, the colors used are posted on the Martha Stewart website.
July 7, 2010
Radio Silence
Been on hiatus for awhile. Unfortunately, super busy with non-creative stuff :( Keeping a blog is way harder than I thought.
Will be back soon, working on updating the rooms in my house so am in the middle of house projects.
Off topic, backyard chicken coops are becoming more and more popular these days. Imagine, fresh eggs everyday. If I ever get organized, I will be harvesting some chicks! Here's a photo of a chicken coop from a recent visit to a local farm:
June 12, 2010
Grated Carrots + Meatballs
I recently discovered how to use grated carrots as a natural sweetener. Perfect for adding extra vegetables into dishes and for finicky eaters who hate carrots! Works especially well in sauces and in ground meats mixtures (like meatballs).

The Microplane is must-have in the kitchen - it is the perfect tool for fine grating and zesting.
INGREDIENTS
1 lb lean ground turkey
1/2 cup finely grated carrot (about 3/4 large carrot)
1/2 finely chopped white onion
1 garlic clove, minced*
1 slice fresh wheat bread (crust removed) crumbs**
1 egg slightly beaten
1 teaspoon dried onions (can substitute with onion powder)
1 teaspoon garlic powder
1 teaspoon dried thyme
1/2 teaspoon salt and pepper
2 teaspoons Worcestershire sauce
1 teaspoon olive oil
Cooking spray
DIRECTIONS
Line a cookie tray with heavy duty foil and spray with cooking spray.
Make bread crumbs and place in a large bowl.
Combine the rest of the above ingredients (except for the cooking spray) in the bowl and gently mix until all ingredients are incorporated into the ground turkey (don't overmix).
With your hands, make 2-inch balls and place on the tray (meat mixture will be soft and wet).
Broil for 10 minutes.
Remove from pan and place in any kind of sauce (recipes below) and simmer for another 15 minutes.
*Tip: for easy removal of garlic from its peel, place garlic in microwave for 20 seconds
**Pulse bread in food processor until fine crumbs
Simple Sweet n' Spicy Tomato Sauce
INGREDIENTS
1/4 cup finely grated carrot (use the remaining 1/4 of above carrot)
1/2 finely chopped white onion
1 garlic clove, finely minced
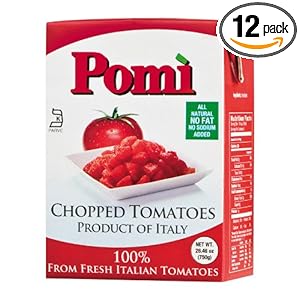
1 can or box of crushed/chopped tomatoes (recommended: San Marzano or Pomi)
1 pinch crushed red pepper flakes
1 teaspoon garlic powder
1 teaspoon dried oregano (or fresh, if you have)
1 teaspoon dried parsley flakes (or fresh, if you have)
2 bay leaves
Salt and pepper to taste
Olive Oil
DIRECTIONS
In a small saucepan, on medium high heat, drizzle olive oil and saute onions and carrots with garlic powder until softened.
Add crushed red pepper flakes and garlic; saute for another minute.
Add tomatoes, oregano, parsley flakes and bay leaves; turn down to low and simmer for 30 minutes.
Salt and pepper to taste.
Garnish with fresh basil if you want.

Swedish Meatball Sauce
INGREDIENTS
1/2 finely chopped white onion
4 tablespoons flour
2 tablespoons butter
2 cups beef or chicken broth
1 cup light sour cream
Pepper to taste
DIRECTIONS
On medium heat, saute onions in butter until translucent.
Add flour and stir until cooked.
Add broth; turn to low and simmer until thickened, about 5 minutes.
Add sour cream, one spoonful at a time while mixing.
Add pepper to taste (I usually add alot).

All off the above are obviously best served over pasta!!
May 30, 2010
Clean Living
I've been thinking a lot about starting posts about living a "greener" and "less-toxic" lifestyle in the modern home. Maybe product reviews or tips I find useful to taking those baby steps in creating a safer environment - starting in the home. It's easy to be consumed by all the glitz of the modern technological world, and even easier to forget that the everyday choices we make can either contribute to the dilapidation of the our world or save what's left of the natural Earth. Internet on phones, Facebook, Pesticides, Made in China products....sometimes it is all a bit much. Don't get me wrong, I enjoy the entertainment that modern technology brings, but sometimes I secretly wish I lived a simpler life...on a farm with nut and fruit trees, a vegetable garden, a chicken coop and a little store to sell goods...

Subscribe to:
Posts (Atom)